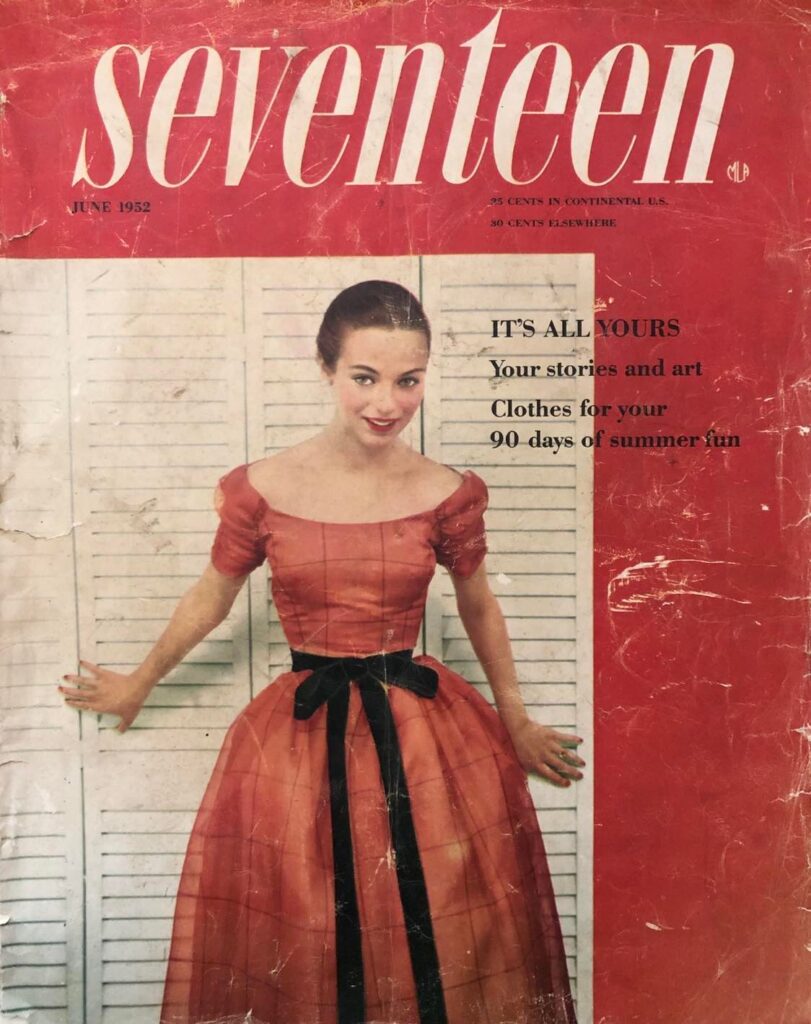
By Laura Svenson
Seventeen, June 1952
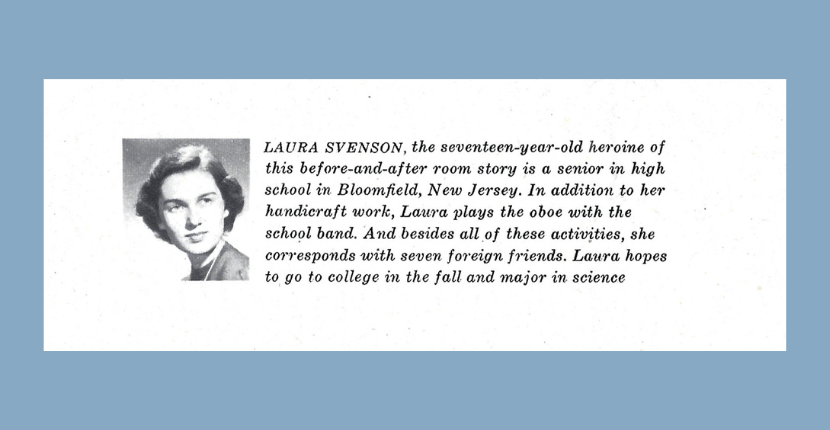
Laura Svenson, the eldest daughter of Happy Hollisters author Andrew Svenson, entered an essay contest in Seventeen magazine when she was a senior in high school. Laura, who inspired the character of Pam Hollister in the book series, wrote about refurbishing her drab bedroom in the family home at 7 Church Street, Bloomfield, New Jersey. Her essay was chosen as the winner of the contest and was published in the June 1952 issue of the magazine. The article follows, along with Laura’s “recipe” for making plaster of Paris plaques.
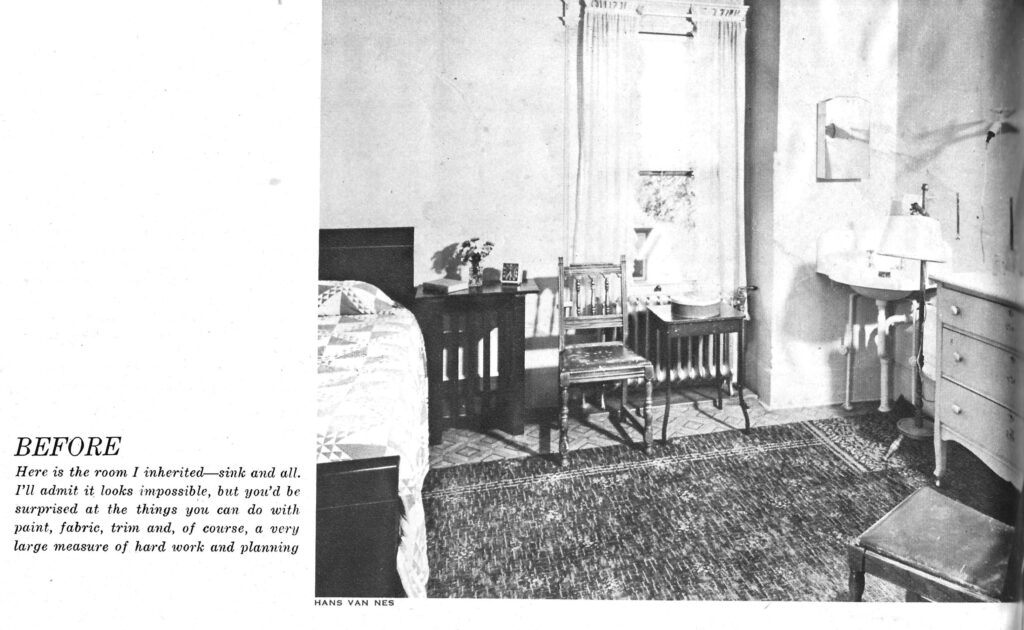
It was really a dream come true. . . . At last I was to have a room of my own. . . . And as I am one of six children you can imagine how exciting an event that really was. Never had I had any privacy. Now, I could have a hideaway of my own to entertain friends and study. Of course, there was The Drawback . . . the family budget was really strained, what with five other children to take care of. I finally landed up with a hodgepodge of furnishings consisting of a metal bed, badly scratched, an ancient porch table to be used as a night stand, two kitchen chairs, a long-legged bureau, a school desk which grandma had come by in some unexplained way, a hanging shelf, a bookcase and a floor lamp. The floor was covered with badly marred brown linoleum. As I said, the privacy of this room was wonderful, but it didn’t take me long to realize that a redecorating job would have to be done . . . and every bit of it would have to be done by me on the proverbial shoestring.
After some research, both literary and physical, I found three things would be necessary—paint, fabric and plenty of drapery and furniture trim. I also found that some carpentry work would be required, but dad came through on that.
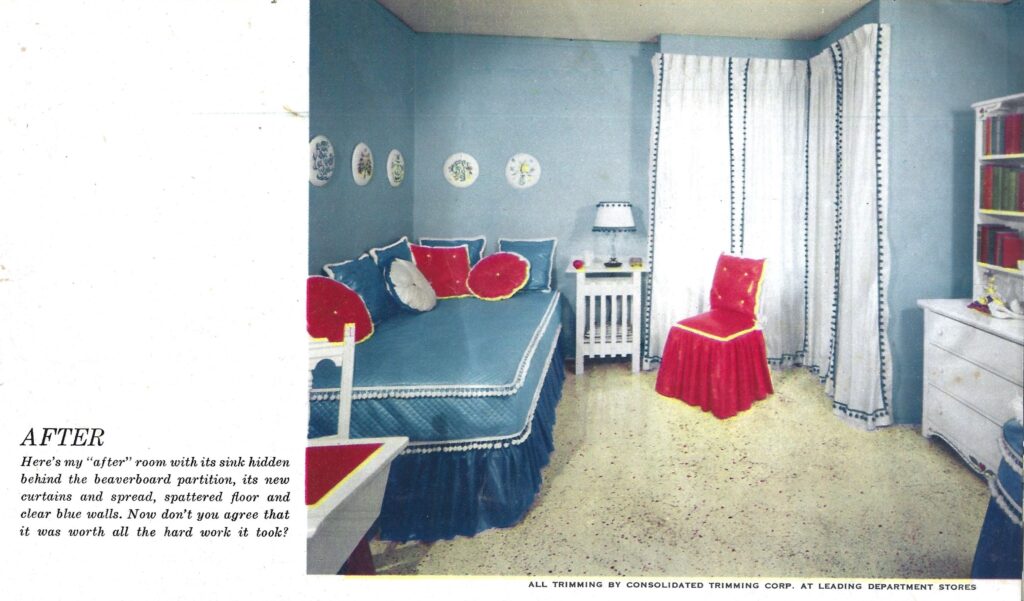
I painted the linoleum white and spattered it with blue and coral dots. This I did by dipping sponges in the paint and shaking them about a foot above the floor. After I finished this job, I could hardly tell the difference between the floor and my bare feet. They were all speckled. But the floor was beautiful!
Now I cut the legs off the dresser and the bottom shelf off the bookcase. The bookcase was placed on top of the dresser, giving it the appearance of a highboy. A few selected books went back on the shelves after I had painted the new highboy white. A design painted on top and bottom added a cheery note.
That old wooden floor lamp had to be renovated. I painted it and the shade white and trimmed the shade with blue ball fringe. I repeated this fringe on a tiny white parchment shade I bought in the five and ten and added an elegant note to the bare electric bulb next to the washstand. The wastebasket was also painted white and set off with blue moss fringe around the top edge.
I painted the desk and night stand white, too. A coral blotter for the desk gave it a colorful touch and made it more inviting.
What to do with the kitchen chairs? I covered four square pillows with coral chintz and sparked them with white moss trim on the edges. Little white pompons on the cushions worked out very well. Coral chintz skirts were stapled to the seats. Then I attached one cushion to each and sewed white gimp onto the cushion to give them a finished look. Ribbon tie-ons were used for the pillow backs and, with all the wood covered, I had a pair of beautiful boudoir chairs.
Now for the bed. I removed the head- and footboards. Dad helped me make a wooden frame with casters, notched to accommodate the bedspring, making a perfect transformation into a studio bed.
I made a blue chintz dust ruffle for the bed. This was attached to a piece of sheeting which fitted under the mattress, so I wouldn’t have to take off the ruffle every time I made the bed. Shirring tape made this as simple as could be, since I sewed I on flat and just pulled the cord to create the shirred effect. I did the top in light blue quilted chintz trimmed with white ball fringe to match the table cover. Four square blue pillows, three round ones, two coral; one, white—all were trimmed with contrasting moss fringe and arranged against the wall.
But I needed a carpentry job to cut off the basin from the rest of the room. A piece of beaverboard, extending from the floor to the ceiling, was nailed to a frame of two by fours which dad put up for me. It was painted blue to match the walls.
Now for the draperies. I thought I would use an off-white color to soften the effect of the pure white furniture and floor. The draperies had to be made for my two window and the opening of the washstand cubbyhole. These were easy to do with the help of a wonderful pleating tape, which made the pinch pleats for me. I realized I would have to build a valance over one window to permit the draperies to fall in front of the radiator. Dad helped again with this, and traverse rods created nice double corner windows. Blue ball fringe added a lively touch to the draperies and picked up enough blue to tie in with the over-all color scheme.
The pièce de résistance, in addition to the friendly effect of the ball fringe, was the row of Pennsylvania Dutch plaques (show at the bottom of pages 70 and 71.) I made them of plaster of Paris molded on a dinner plate and decorated them with Pennsylvania Dutch designs. Bent hairpins were used as hooks. The plaques were then hung in the bed corner of the room.
After I got into the refurbishing act full force, my family became infected with my enthusiasm. Mother gave me a low flower dish for the table; sister Eileen contributed a hurricane lamp; Jane came up with a storybook doll for my converted highboy, and brother Andy with a few knickknacks.
My friends love my new room and so do I, and I feel as modern as a 1952 Paris creation.
THE END
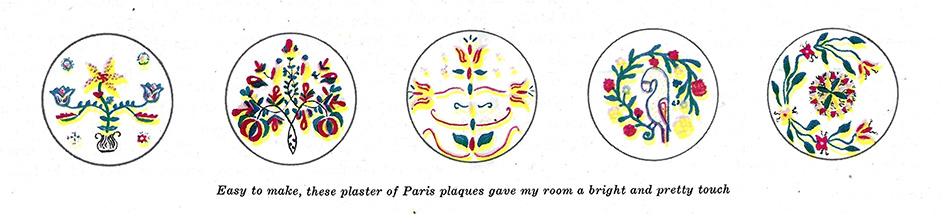
Recipe for Plaster Plaques
Plaster of Paris · paint · water · designs · dinner plate · time · heavy hair pin
Mix Plaster of Paris and water to form thick paste. Work quickly, as plaster hardens rapidly. Pour into smooth dinner plate. (Tell Mother not to be worried. The plaster will not harm the dish!) Insert bent hair pin near edge of dish to provide hook with which to hang. Permit the mixture to harden for several days. Then, with knife, chisel plaster away from edges. This is the only place the plaster will stick to plate—about ¼ inch around edge. Tap lightly on bottom of dish. The plaque should, with slight persuasion, slip out of the mold. Dry again for about a week. The longer the drying period, the better. Paint design on smooth surface. (I use a paint that can be used on any material but have also used tempera colors.) The finished product will be well worth the time and effort used in making it!